티스토리 뷰
안녕하세요 :) Zedd입니다.
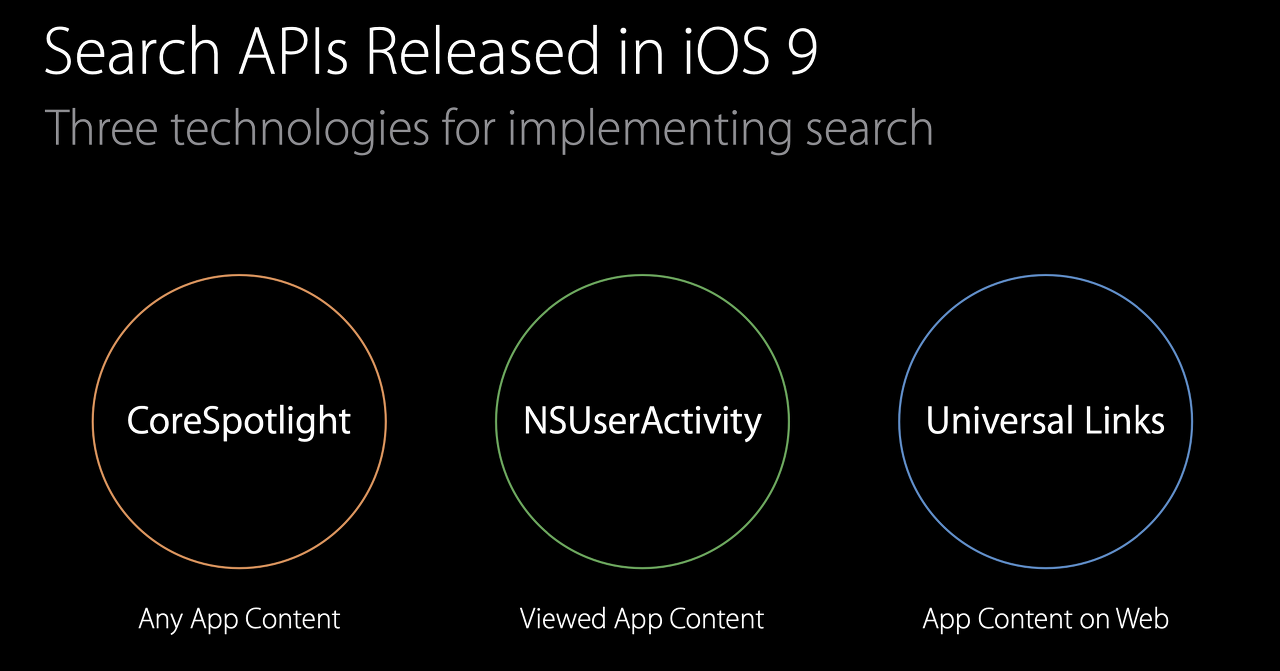
iOS Search API글에서 아주아주 간략하게만 봤는데,
오늘은 그 중

CoreSpotlight에 대해서 간단히 공부해보겠습니다.
[CoreSpotlight 특징]
- Any App Content
- content를 on-device index에 추가 (private)
- app에 대한 딥링크를 활성화하는데 도움이 되는 API제공
- 사용자가 index를 생성하기 위해 content를 방문할 필요가 없음
- 친구, 즐겨찾기로 표시된 항목, 구입한 항목과 같은 사용자 별 content를 indexing하는데 가장 적합
-> 사용자가 spotlight검색 결과에서 자신의 content를 쉽게 찾을 수 있음.
- item이 수천개 이하일 때 가장 잘 동작함
정도였는데요. 가장 중요한건 on-device indexing을 한다는 점인것 같습니다.
제가 예제가 잘 생각이 안나서요 ㅎ...
친구, 즐겨찾기로 표시된 항목, 구입한 항목과 같은 사용자 별 content를 indexing하는데 가장 적합
이라고 했으니..


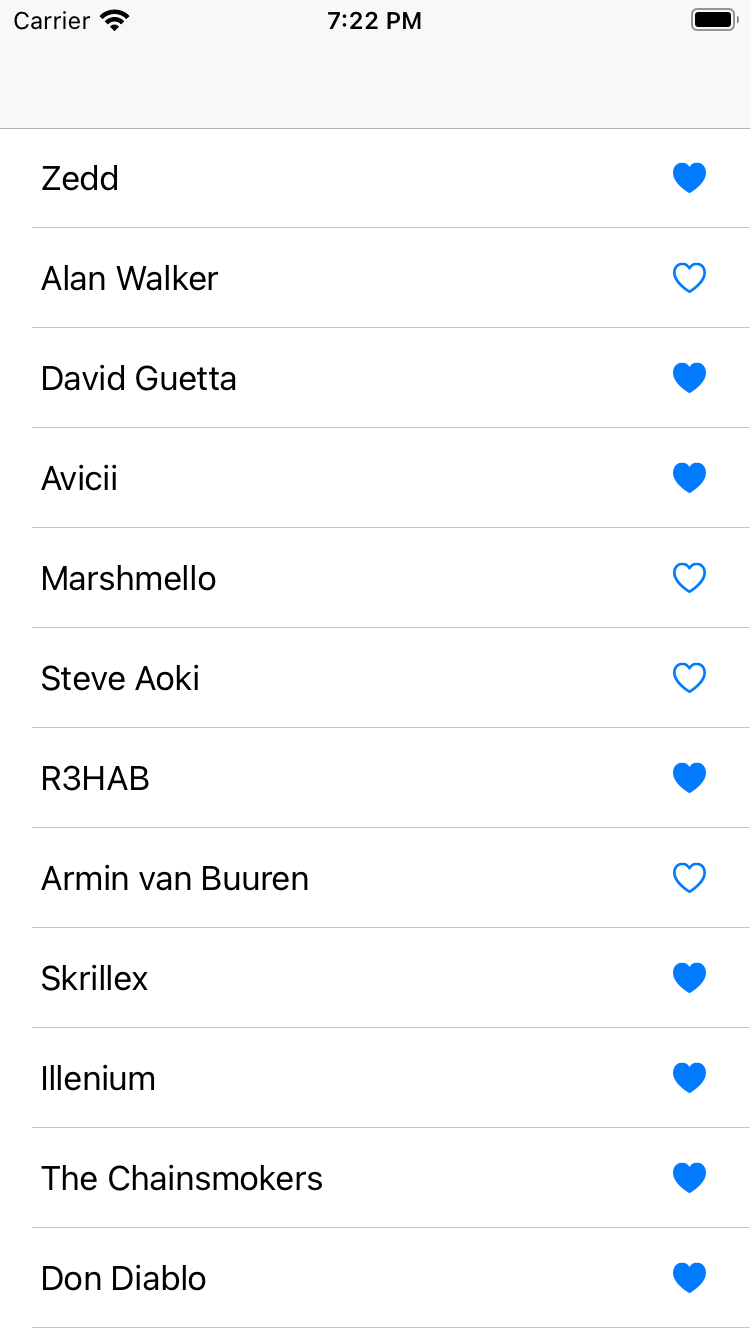
즐겨찾기 예제를 만들었습니다.
즐겨찾기한 친구를 Spotlight에서 검색할 수 있고, 최종적으로는

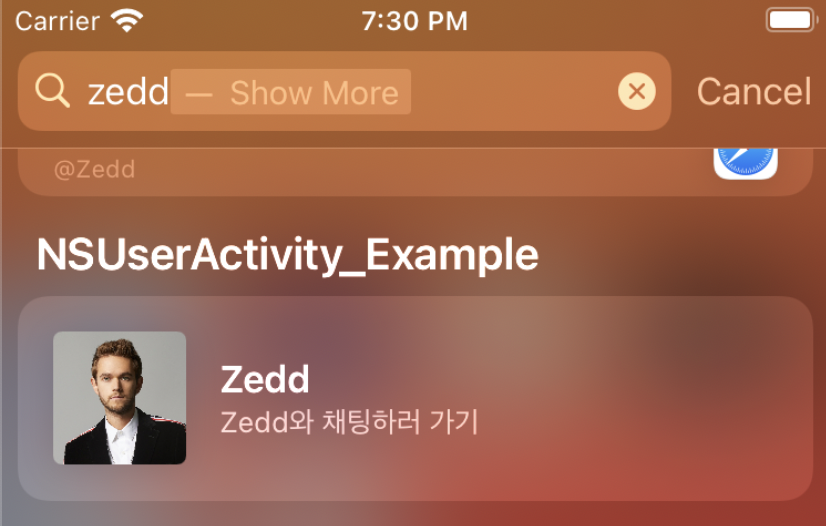
Spotlight에서 요걸 볼 수 있게 할거에요!
# Creating Searchable Items
1. import
import CoreSpotlight
import MobileCoreServices
2.
func tableView(_ tableView: UITableView, didSelectRowAt indexPath: IndexPath) { } 저는 tableView didSelect에서 해주겠습니다.
3. Spotlight에서 보여질 정보들 세팅


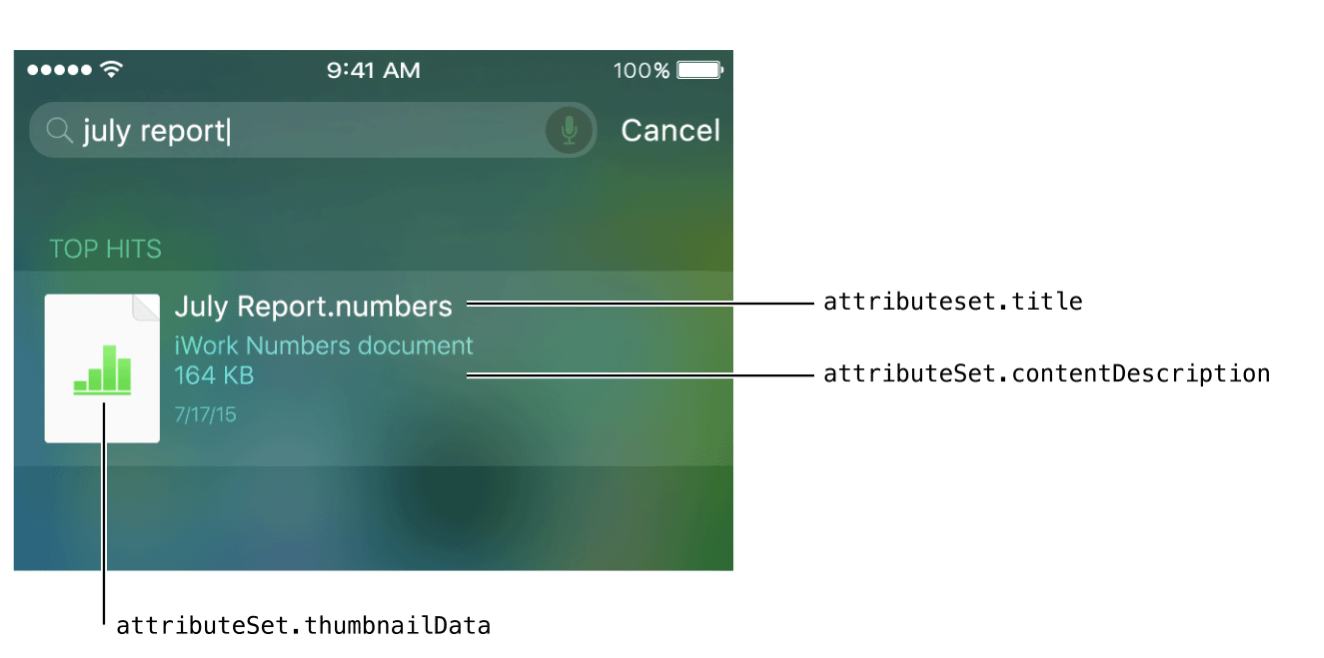
뭐 이미지나, title, 설명 이런걸 보여지게 해야하잖아요?
CSSearchableItemAttributeSet를 만들면 이런 metadata들을 세팅할 수 있습니다.
let name = self.nameArr[indexPath.row]

// Create an attribute set to describe an item.
let attributeSet = CSSearchableItemAttributeSet(itemContentType: kUTTypeData as String)

// Add metadata that supplies details about the item.
attributeSet.title = "\(name)"
attributeSet.contentDescription = "\(name)와 채팅하러 가기"
attributeSet.thumbnailData = UIImage(named: "zedd")?.pngData()
이런식인거죠. (이미지는 그냥 무조건 "zedd"를 넣어주게 했음;;)
4. CSSearchableItem 생성
내가 정보를 세팅했으니 이 정보들이 Searchable한 Item이 되도록 만들어줘야합니다.
let item = CSSearchableItem(uniqueIdentifier: "\(name)", domainIdentifier: "file-1", attributeSet: attributeSet)uniqueIdentifier : item의 유니크한 identifier가 필요합니다. 만약 nil로 지정되면 identifier는 자동으로 만들어집니다.
domainIdentifier : 앨범과 비슷하게 item을 그룹화 하는데 도움이 되는 도메인의 식별자입니다.
attributeSet : 아까 만들어준 attributeSet
5. on-device index에 item추가
CoreSpotlight의 특징이 on-device indexing이었죠.
on-device index에 방금 만든 item을 넣어주는 작업을 해야합니다.
CSSearchableIndex.default().indexSearchableItems([item]) { error in
    if error != nil {
        print(error?.localizedDescription)
    }
    else {
        print("Item indexed.")
    }
}
그럼 끝!!!
실행하면

spotlight에서 검색시 위와같은 결과를 얻을 수 있습니다 \ㅎ_ㅎ/
# 눌렀을 때 Action
이제 저걸 눌렀으면 Zedd와 채팅할 수 있는 ChatViewController로 이동해야합니다.
저걸 누르면 특별한 메소드가 호출되는데요
[AppDelegate]
func application(UIApplication, continueUserActivity
				 userActivity: NSUserActivity,
				 restorationHandler: [AnyObject]? -> Void) -> Bool { }
[SceneDelegate]
func scene(_ scene: UIScene, continue userActivity: NSUserActivity) {
    // code
}
저는 SceneDelegate가 있는 프로젝트여서 SceneDelegate로 해보겠습니다.
func scene(_ scene: UIScene, continue userActivity: NSUserActivity) {
   if userActivity.activityType == CSSearchableItemActionType {
   // CoreSpotlight를 사용해서 indexing된 activity이라면
       let userInfo = userActivity.userInfo
       let uniqueIdentifier = userInfo? [CSSearchableItemActivityIdentifier] as? String

       print(uniqueIdentifier) // Optional("Zedd")
   }
}
이런식!!
아까 uniqueIdentifier로
let item = CSSearchableItem(uniqueIdentifier: "\(name)", domainIdentifier: "file-1", attributeSet: attributeSet)이름을 넘겨줬기 때문에 "Zedd"가 나오게 됩니다.
그래서..
이런식으로 해주면..!!!


요렇게 되는것이죠. 하지만 오른쪽 gif를 봅시다.
🚨앱을 종료하고 CoreSpotlight를 이용하여 들어가니 ChatViewController로 제대로 진입하지 않습니다.🚨
1. 앱이 실행중이거나 background에 있음 -> CoreSpotlight를 이용해 앱 실행 -> scene(_ scene: UIScene, continue userActivity:) 메소드가 잘 불림
2. 앱이 background에 없음 -> CoreSpotlight를 이용해 앱 실행 scene(_ scene: UIScene, continue userActivity:) 메소드가 안불림
그래서@!!!
willConnectTo 메소드에서 connectionOptions.userActivities.first를 이용해 scene(_ scene: UIScene, continue userActivity:)를 호출해줘야합니다.
~ 최종 ~

CoreSpotlight에는 삭제..delegate메소드.. 엄청 많은 기능을 가지고 있습니다.
(위 내용들은 WWDC16 Making the Most of Search APIs를 참고해주세요)
진짜x100 기초만 본거에요. 요건 차차 공부해보겠습니다.
참고
'iOS' 카테고리의 다른 글
| VoiceOver환경에서 TableView Row 옮기기, 삭제하기 (feat. 로터 사용법) (0) | 2021.05.23 |
|---|---|
| UITabBar와 UILongPressGestureRecognizer (1) | 2021.05.16 |
| iOS Search API (0) | 2021.05.09 |
| RxFlow (0) | 2021.04.04 |
| preferredFont와 UIFontMetrics (0) | 2021.04.02 |
- Swift
- fastlane
- 피아노
- np-hard
- swift sort
- IOS
- Combine
- WKWebView
- SwiftUI
- swift 공부
- swift tutorial
- swift delegate
- iOS delegate
- ios 13
- github
- WWDC
- Xcode
- actor
- Git
- WidgetKit
- Accessibility
- UIBezierPath
- 스위프트 문법
- FLUTTER
- swift3
- 회고
- 제이슨 파싱
- swift array
- np-complete
- 스위프트
- Total
- Today
- Yesterday
